
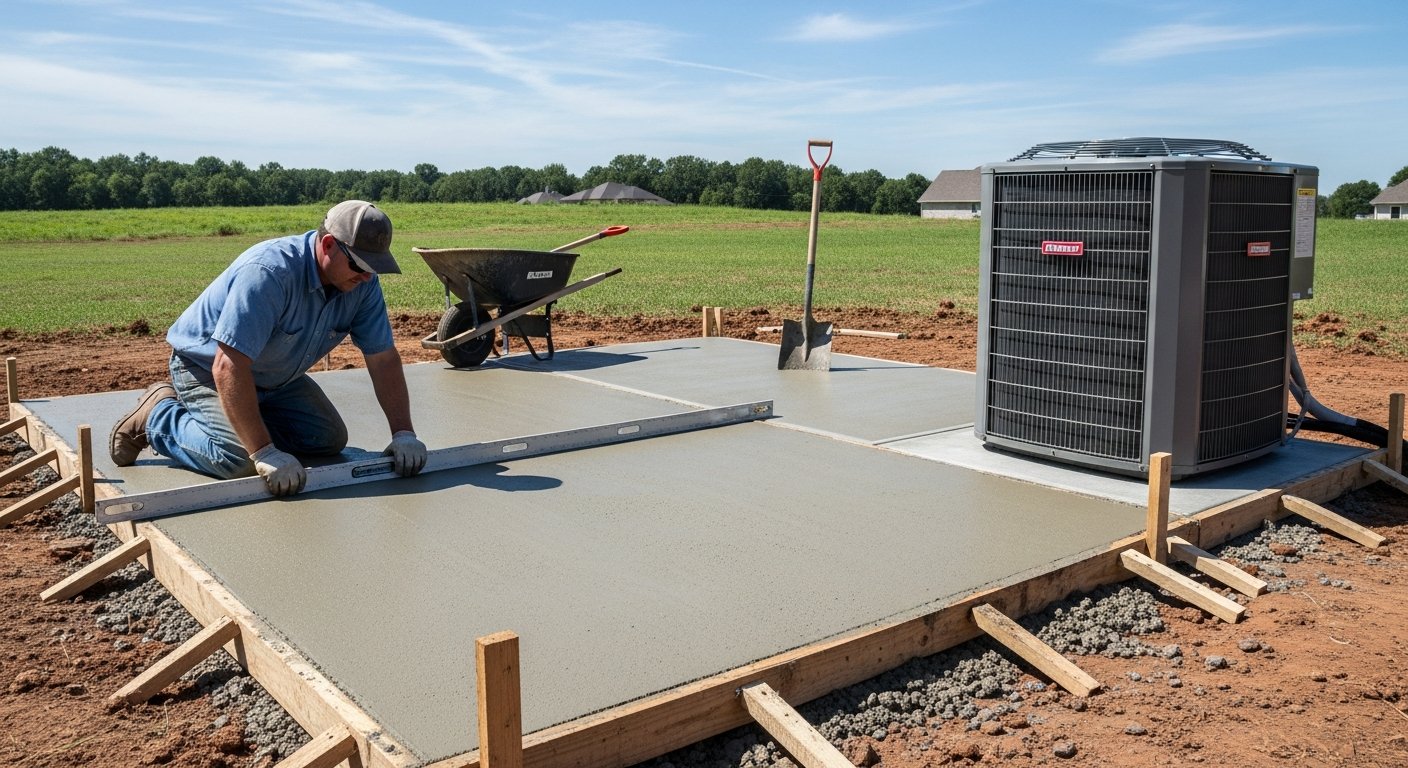
When your air conditioning unit arrives, the last thing you want is an unstable, uneven surface that leads to premature wear or costly repairs. In Arkansas, where summer heat demands reliable cooling, a properly poured concrete pad is the foundation of your system’s longevity. This AC unit concrete pad installation guide Arkansas homeowners need covers everything from site selection to curing, ensuring your investment sits on solid ground for years to come. Whether you are replacing an old unit or installing a new system, getting the pad right from the start saves time, money, and frustration.
Why a Concrete Pad Matters for Your AC Unit
An air conditioner condenser weighs several hundred pounds and generates significant vibration during operation. A concrete pad provides a level, stable base that prevents the unit from sinking into soft soil, shifting during storms, or tilting over time. In Arkansas, with its freeze-thaw cycles and heavy spring rains, the ground can move considerably. Without a proper pad, your AC unit can settle unevenly, causing refrigerant lines to kink, electrical connections to loosen, and the compressor to operate inefficiently.
Beyond stability, a concrete pad elevates the condenser above ground level, protecting it from standing water, debris, and pests. Arkansas summers bring sudden downpours that can flood low-lying areas. A well-constructed pad keeps the unit dry and reduces the risk of rust and corrosion. Additionally, many manufacturers require a level concrete foundation to honor their warranty. Skipping this step or using a flimsy alternative like plastic or gravel can void your coverage and lead to expensive out-of-pocket repairs.
Arkansas Building Codes and Permits for AC Pads
Before you start digging, it is essential to understand local requirements. In Batesville and surrounding areas, residential concrete pads for mechanical equipment typically fall under the International Residential Code (IRC). While a permit may not be required for a simple pad replacement, any work involving electrical or refrigerant lines usually does require inspection. Always check with your local building department before pouring concrete.
Key code considerations include a minimum pad thickness of 3 to 4 inches for standard residential units, though heavier commercial systems may need 5 inches or more. The pad must extend at least 2 inches beyond the base of the AC unit on all sides. Additionally, the pad should sit on a compacted gravel base to improve drainage and prevent frost heave. In Arkansas, where the frost line is relatively shallow at around 12 to 18 inches, a properly compacted subbase is critical to prevent shifting during winter freezes. For more on preparing stable foundations, see our guide on concrete pad for shed preparation drainage Arkansas which covers similar principles of base preparation and drainage.
Step-by-Step Installation Process
1. Choose the Right Location
Select a spot that provides adequate airflow around the condenser. Most manufacturers require at least 12 to 24 inches of clearance on all sides and 5 feet above the unit. Avoid placing the pad directly under windows or near dryer vents, as lint and debris can clog the coils. Also, ensure the location is accessible for future maintenance and repair. In Arkansas, consider placing the pad on the north or east side of the house to reduce direct sun exposure, which can improve efficiency during blistering summer afternoons.
2. Excavate and Prepare the Base
Mark the pad dimensions, typically 36×36 inches for a standard residential unit, though check your unit’s specifications. Excavate the soil to a depth of at least 6 to 8 inches. Remove all organic material, roots, and rocks. The hole should be slightly wider than the pad to allow for forms. Next, add 4 to 6 inches of compactible gravel or crushed stone. Compact the gravel thoroughly using a hand tamper or plate compactor. Proper compaction prevents settling later. Slope the gravel slightly away from the house to encourage drainage.
3. Build and Level the Forms
Use 2×4 lumber to create a form box that matches your desired pad dimensions. Ensure the forms are level and square. Drive stakes into the ground outside the forms to hold them in place. Check for level in both directions; a slight slope of 1/4 inch per foot away from the house is acceptable to shed water. Double-check your measurements and confirm the form height will produce a pad at least 3.5 inches thick. If the ground slopes, the form may need to be taller on one side to maintain a level top surface.
4. Mix and Pour Concrete
For a standard AC pad, you can use pre-mixed concrete bags (80-pound bags) or order ready-mix for larger jobs. Calculate the volume needed: a 36x36x4-inch pad requires roughly 4 cubic feet, which is about six 80-pound bags. Mix concrete according to the manufacturer’s instructions, aiming for a stiff but workable consistency. Pour the concrete into the forms, filling evenly. Use a shovel or hoe to spread it, then use a screed board (a straight 2×4) to level the surface by dragging it across the forms in a sawing motion.
5. Finish and Cure the Surface
After screeding, use a magnesium float to smooth the surface and bring cream to the top. Avoid overworking the concrete, as this can weaken the surface. For a non-slip finish, lightly broom the surface perpendicular to the direction of traffic. Allow the concrete to set until it is firm enough to hold an edge, then use an edging tool to round the corners. Curing is critical in Arkansas heat. Cover the pad with wet burlap or a curing compound, or simply mist it with water several times a day for at least three days. Keep the concrete moist to prevent cracking. Wait a minimum of 24 hours before removing the forms and 7 days before placing the AC unit on the pad.
Common Mistakes to Avoid
Even experienced DIYers can make errors that compromise the pad’s performance. Here are the most frequent pitfalls and how to avoid them:
- Skipping the gravel base: Pouring concrete directly onto soil leads to cracking and settling as the ground shifts with moisture changes.
- Inadequate thickness: A pad thinner than 3 inches can crack under the weight of the unit, especially in heavy commercial systems.
- Ignoring level: An unlevel pad causes the compressor to work harder, reducing efficiency and shortening the unit’s lifespan.
- Poor drainage: If water pools around the base, it can seep into electrical components and cause corrosion or short circuits.
- Rushing the cure: Arkansas heat can cause concrete to dry too quickly, leading to surface cracks. Always keep the pad moist during curing.
Avoiding these mistakes will save you from having to redo the job or call a professional later. If you are unsure about any step, consulting a local contractor is a wise investment.
When to Hire a Professional
While pouring a concrete pad is a manageable DIY project for many homeowners, certain situations warrant professional help. If your AC unit is a large commercial model weighing over 500 pounds, the pad may need reinforcement with rebar or wire mesh. Similarly, if your property has challenging soil conditions, such as expansive clay or a high water table, a contractor can design a base that prevents future movement. Professionals also handle proper disposal of old pads, which can be heavy and awkward to remove. In Batesville, local concrete services offer expertise in local soil conditions and can complete the job quickly, often with a warranty on workmanship.
Another reason to hire a pro is if you need to integrate the pad with existing landscaping or hardscaping. A contractor can ensure the pad matches nearby patios, walkways, or stamped concrete features, maintaining your home’s curb appeal. They also have the equipment to pour larger pads efficiently and can coordinate with your HVAC installer for seamless timing.
Maintenance and Long-Term Care
Once your concrete pad is in place and the AC unit is installed, minimal maintenance is required. However, a few simple steps will extend the life of both the pad and the equipment. Inspect the pad annually for cracks or signs of settling. If you notice hairline cracks, they can often be sealed with a concrete crack filler to prevent water infiltration. Keep the area around the pad free of weeds and debris, as vegetation can trap moisture against the concrete. During heavy rains, check that water is draining away from the pad and not pooling around the base.
If you have trees nearby, monitor root growth that could lift or crack the pad over time. Roots can exert surprising force, especially from fast-growing species common in Arkansas. Trimming roots or installing a root barrier during initial installation can prevent future problems. Finally, if you ever replace the AC unit, verify that the new unit fits the existing pad. If it is larger, you may need to extend the pad or pour a new one. Proper planning during the initial install can accommodate future upgrades.
By following this AC unit concrete pad installation guide Arkansas residents can trust, you ensure your cooling system operates efficiently for many summers. A little effort upfront pays off in reliability, energy savings, and peace of mind.